Git and GitHub for Marketers Who Have Never Touched Code
A plain-words starter guide to Git, GitHub and Markdown for marketers. What the words mean, how to set up a tidy profile, how to make your first repository and pull request, and what never to put in a repo.

When I first learned Git and GitHub, it took me a while to even understand what a pull request was. The words were strange, the screens were busy, and every tutorial assumed I already knew half of it.
Even once I could use Git fairly well, I'd rather not do it by hand. These days I don't have to. Claude Code does the Git work for me, and my job is to review what it's doing instead of manually creating pull requests. That shift is a big part of why my content marketing workflow became agentic.
But you still need to know what you're looking at. If you've never opened a terminal or used Git, all of this can feel overwhelming. So this series is written for you, in plain words, one step at a time.
This is Part 1 of 4:
- Git and GitHub for marketers who have never touched code (you're here)
- Your AI brain is not a dumping ground: how to structure a repo so AI gets the right context
- Every way to use Claude: chat, Projects, Cowork, scheduled tasks, Claude Code, Claude Design and Claude in Chrome
- Connecting GitHub to Claude: skills, saving tokens and reviewing what Claude does
If a word trips you up anywhere in the series, check the plain-words AI glossary for marketers.
Why a marketer should bother with GitHub
Here's the short version. If you use AI tools at work, you probably keep pasting the same things into them: your brand voice, your style rules, your best examples, your product facts. That pile of knowledge is your "digital brain".
A GitHub repository is the best home I've found for it. Every Claude surface can read from it, so you write your rules once and reuse them everywhere. And because it's Git, you get a history of every change: who changed the tone of voice doc, when, and what it said before.
You don't need to become a developer for this. You need to understand a handful of ideas and click a handful of buttons.
What Git is
Git is a version control system. That's a fancy way of saying it keeps a record of every change to your files, so you can always go back to an earlier version.
The easiest way to picture it is track changes for a whole folder. Or save points in a video game. Each time you're happy with your work, you make a save point (Git calls it a commit) with a short note about what you changed. If something breaks later, you can go back to any save point.
Git lives on your computer. It doesn't need the internet to work.
What GitHub is, and how it differs from Git
GitHub is a website that hosts Git repositories and adds tools for working together, such as pull requests and reviews.
So the difference is simple:
- Git is the tool that tracks changes.
- GitHub is the online home where your Git folders live, so you can back them up, share them and review changes with other people (or with AI).
A rough comparison: Git is like the track changes feature, and GitHub is like Google Drive, the place the document lives and gets shared.
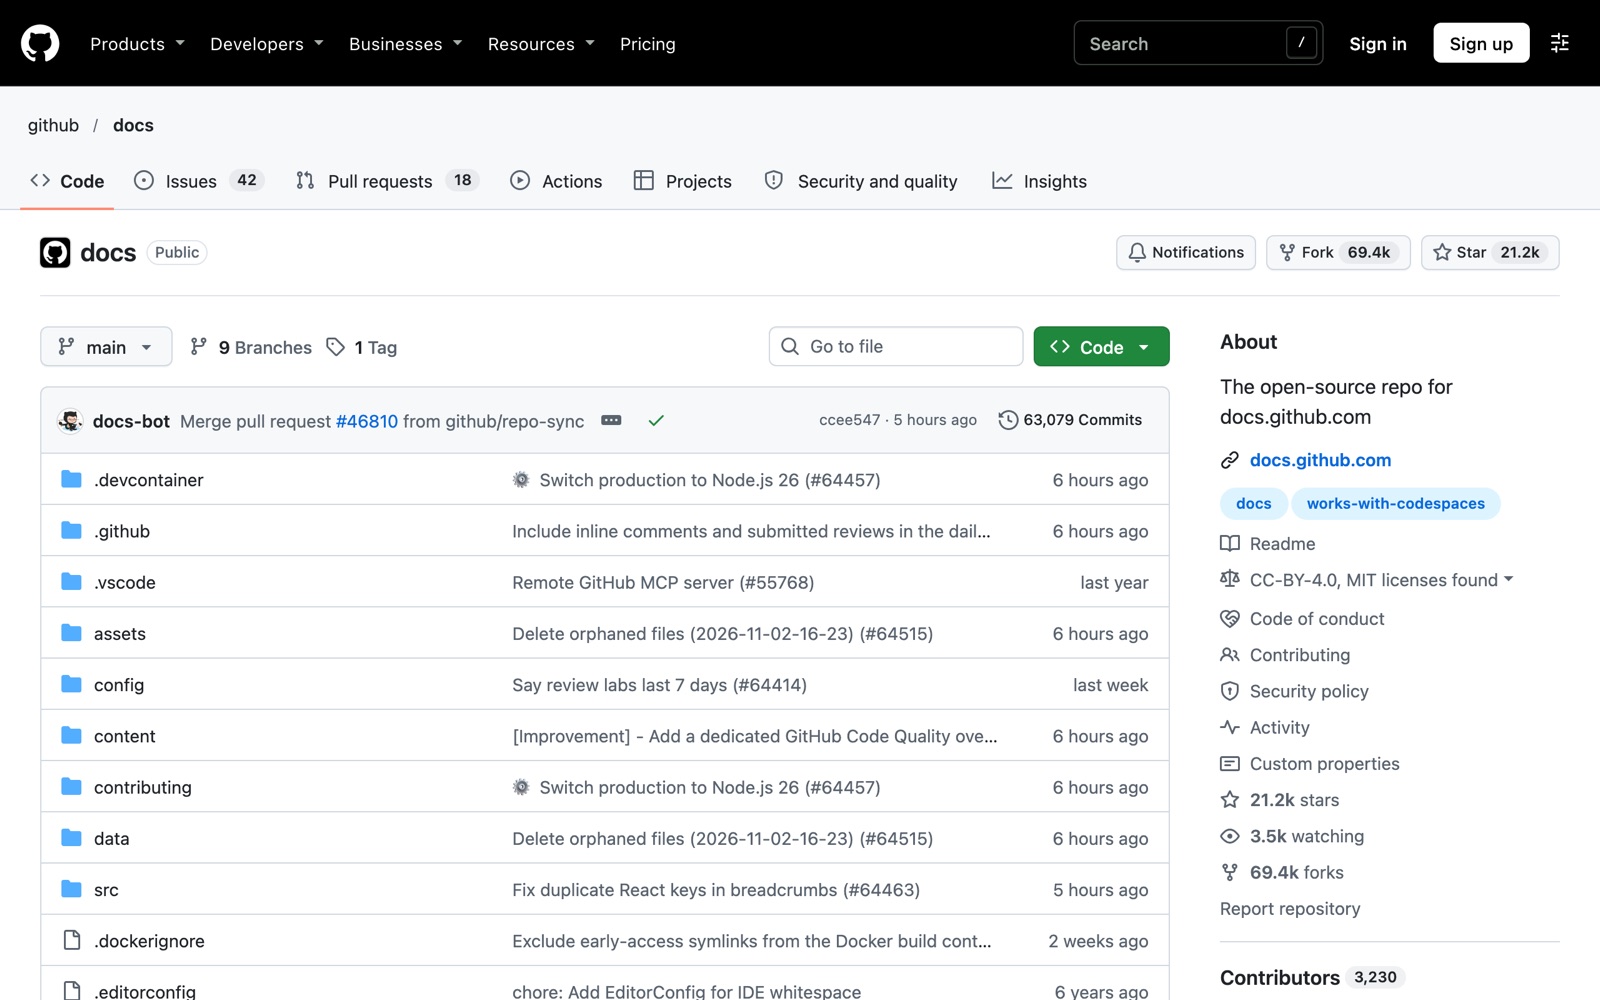
Here's what a repository looks like on GitHub. This is the public repo behind GitHub's own documentation: the files on the left, the latest commit note above them and the total number of commits on the right.
What Markdown is
Before we go further, one more thing you'll see everywhere: Markdown.
Markdown is plain text with a few simple symbols that turn into formatting. You write it in any text editor, and files usually end in .md. The Markdown Guide's basic syntax page covers everything, but you only need four symbols to start:
#at the start of a line makes a heading (##for a smaller one)**two asterisks**around words makes them bold-at the start of a line makes a bullet point[link text](https://example.com)makes a link
Here's a tiny brand voice note written in Markdown:
# Brand voice

We sound **warm and direct**.

- Use British English
- Short sentences
- Link to sources: [our style guide](https://example.com/style)
And here's roughly how it looks once it's displayed:
Brand voice                      (big heading)

We sound warm and direct.        ("warm and direct" in bold)

  • Use British English
  • Short sentences
  • Link to sources: our style guide   (clickable link)
Why does this matter for AI? Because AI tools love Markdown. It's light, it's structured, and both humans and models can read it easily. The README on the front page of a GitHub repo is Markdown. The CLAUDE.md file that tells Claude how to behave in a project is Markdown. Claude skills are Markdown too. Learn these four symbols and you can read and edit most of the files in this series.
The words you'll keep seeing
Here's a cheat sheet. Don't try to memorise it. Come back whenever a word confuses you.
| Word | What it means in plain words |
|---|---|
| Repository (repo) | A project folder that Git tracks. It holds your files and each file's revision history. |
| Commit | A save point with a short note describing what changed. |
| Branch | A safe copy of your work where you can try changes without touching the main version. The main version is usually called main. |
| Pull request (PR) | A request to bring the changes from your branch into main. It's where people review and discuss the changes before they're accepted. |
| Merge | Accepting a pull request, so the changes join main. |
| Clone | Downloading a copy of a repo from GitHub onto your computer, history included. |
| Push | Sending your new commits from your computer up to GitHub. |
| Pull | Bringing new commits from GitHub down to your computer. |
| README | The README.md file GitHub shows on a repo's front page. Think of it as the cover note. |
| .gitignore | A file listing things Git should skip when you commit, like secret files or junk your computer creates. |
| Public vs private | A public repo is visible to everyone on the internet. A private repo is visible only to you and the people you invite. |
Step 1: set up your GitHub account
Go to github.com and sign up. A few tips before you click through.
Pick your username with care
It shows up in every link you share, like github.com/yourname. Use something close to your name or your professional handle, keep it short, and avoid anything you'd be embarrassed to show a client. If you'll use one account for work and personal projects, keep it neutral.
Turn on two-factor authentication
Two-factor authentication (2FA) means signing in needs your password plus a code from your phone. GitHub has required 2FA for people who contribute code since March 2023, and it's worth turning on either way. Click your profile picture, then Settings, then Password and authentication, then Enable two-factor authentication. GitHub recommends an authenticator app over text messages. When it gives you recovery codes, save them somewhere safe, like your password manager. They're how you get back in if you lose your phone.
Make private the default for company stuff
Anything to do with your employer or clients goes in a private repository. You can always make a repo public later on purpose. It's much harder to undo something that was public by accident.
Step 2: make your profile look nice
Your GitHub profile is a small public page about you. If you plan to share your work, a tidy profile helps. GitHub's guide to personalising your profile covers it all, but here are the main pieces.
Profile picture and bio
In Settings, under Public profile, you can upload a profile picture and write a bio. The bio is short, 160 characters maximum, so treat it like a LinkedIn headline. Say what you do and what you're interested in. Your picture and bio stay visible even if you make your profile private, so keep them professional.
The special profile README
A nice trick: if you create a repository with exactly the same name as your username, GitHub shows its README on your profile page. It's a mini homepage written in Markdown.
According to GitHub's profile README docs, it only appears when:
- the repo name matches your username
- the repo is public
- it has a
README.mdfile in the top level, with something in it
To make one, click the plus icon at the top right, choose New repository, type your username as the name, select Public, switch Add README on, and click Create repository. Then click Edit README and write a few lines about yourself. This one has to be public, so it's for your personal intro only, never anything confidential.
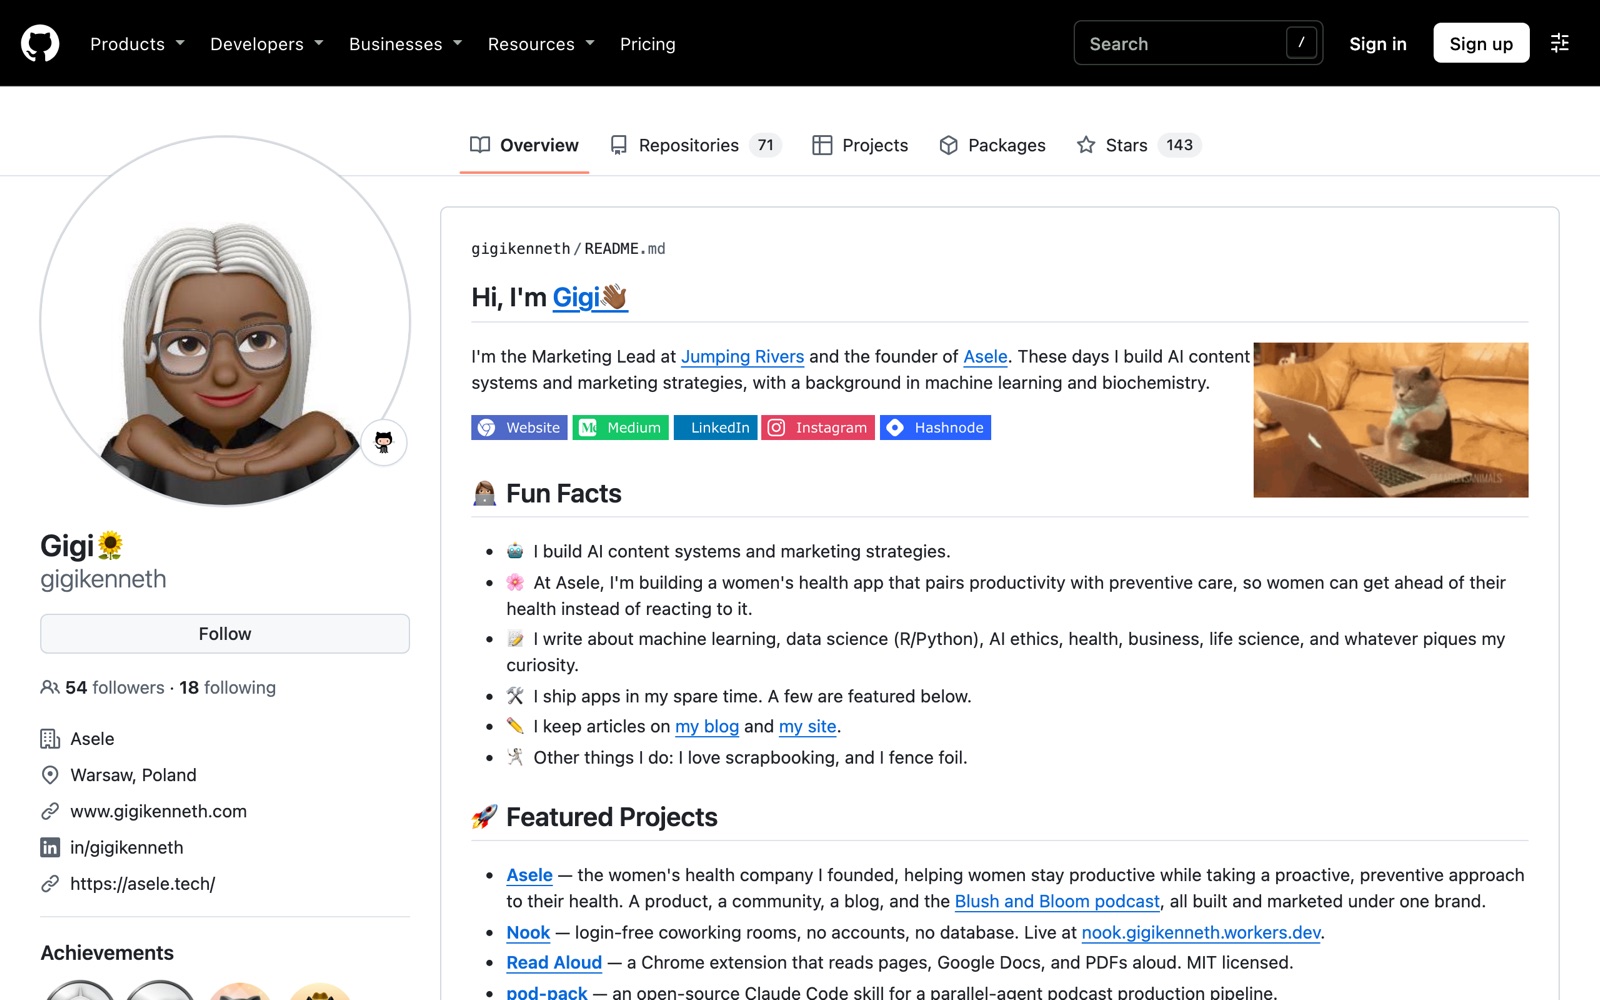
Here's mine, for an idea of what a few lines of Markdown can look like:
Pinned repositories
You can pin up to six repositories to the top of your profile. Go to your profile, click Customize your pins, pick the ones you're proudest of, then Save pins. Only public repos will be visible to visitors, so this is for work you're happy to show off.
Optional extras: badges and stats
Some people decorate their profile README with little badges and stats cards. These come from third-party tools, not GitHub itself. Shields.io makes small badge images (for example, a "LinkedIn" badge that links to your profile), and GitHub Readme Stats makes cards that summarise your activity. They're optional. A clear, friendly paragraph about you does more work than ten badges.
Step 3: create your first repository
Let's make a private repo for your digital brain. You can do all of this in the browser. GitHub's repository quickstart has the same steps with screenshots.
- Click the plus icon at the top right of any GitHub page, then New repository.
- In Repository name, type something simple, like
marketing-brain. - Add a short description if you like.
- Choose Private.
- Switch Add README on.
- Click Create repository.
That's it. You now have a Git-tracked folder living on GitHub, with one file in it: README.md.
Step 4: edit a file and make your first commit
Now let's change that README, still in the browser.
- Click README.md in the file list.
- Click the pencil icon (Edit file) at the top right of the file.
- Write a few lines in Markdown. Try a heading and a short list of what this repo will hold, like your brand voice, product facts and best examples.
- Click Preview to see how it looks. Show diff highlights what you added.
- Click Commit changes...
- Write a short commit message, like "Describe what this repo is for".
- Click Commit changes.
You just made a commit. Your repo now keeps a history of every save point, each with your note and the exact lines that changed.
Step 5: get the repo onto your computer
Editing in the browser is fine for small changes. But to use your repo with AI tools on your laptop, you'll want a copy on your computer. That's called cloning.
The gentlest route: GitHub Desktop
GitHub Desktop is a free app from GitHub that gives you buttons instead of typed commands. It's how I'd suggest starting.
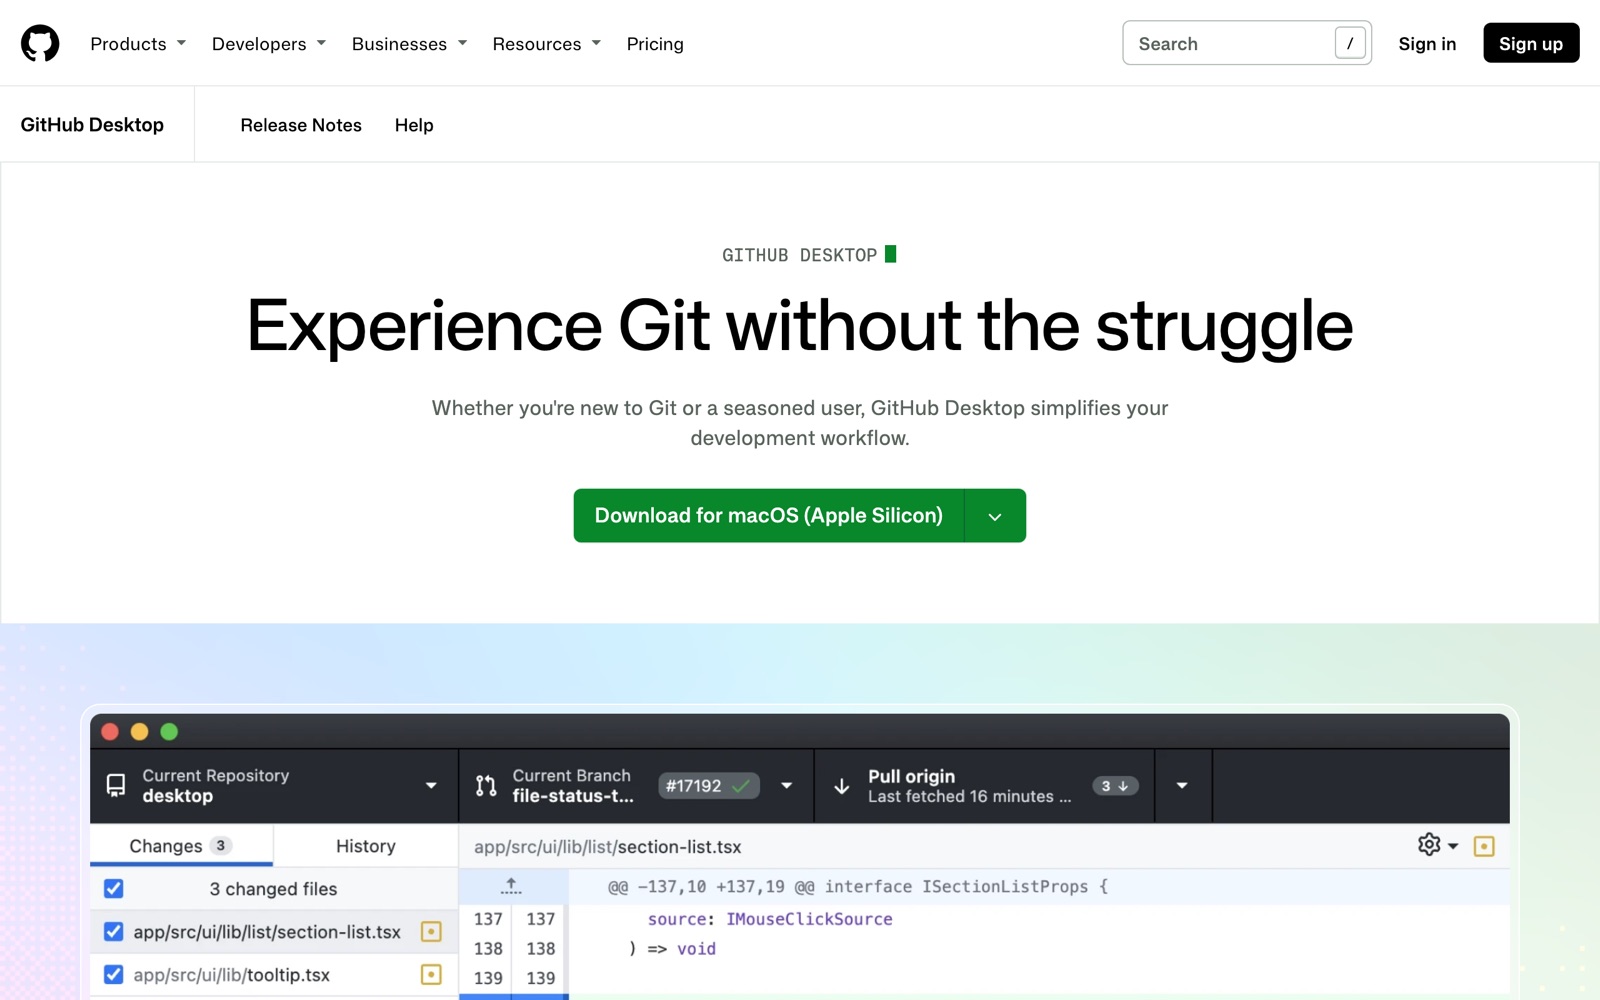
Following GitHub's getting started guide for Desktop:
- Download GitHub Desktop from desktop.github.com and install it.
- Sign in. On a Mac, go to GitHub Desktop, then Settings, then Accounts, and click Sign Into GitHub.com.
- Choose File, then Clone Repository..., pick
marketing-brainand choose where to save it on your computer.
Now you have a normal folder on your computer. Open any file in it with a text editor, change something and save. GitHub Desktop will show you what changed. To make a save point, type a short note in the Summary box and click Commit to main. Then click Push origin to send it up to GitHub.
The terminal exists (and you won't need it yet)
Developers mostly use Git by typing commands into the terminal, the text window where you talk to your computer directly. You'll see commands like git commit and git push in tutorials. You don't need them for this series.
If you're on a Mac and want Git installed anyway (Claude Code will need it later), the official Git site lists a few options. The simplest is to open the Terminal app and run:
xcode-select --install
That installs Apple's command line tools, which include Git. A window will pop up and walk you through it.
From Part 3 onwards, Claude Code will run the Git commands for you. You'll describe what you want, it will make the branch, the commits and the pull request, and you'll review its work. That's the whole point of learning the ideas now: so you know what you're approving.
Step 6: your first pull request
Pull requests took me a while to understand, so let's go slowly.
Think of a shared Google Doc. You switch to suggesting mode, make some edits, and the doc owner reviews each suggestion before accepting it. A pull request is that, for a whole folder.
Here's the flow in plain words:
- Branch. Make a safe copy of the work where you can change things without touching
main. - Change. Edit files on that branch and commit your changes.
- Pull request. Ask for your branch's changes to be brought into
main. - Review. You (or a teammate) read through exactly what changed, line by line, and leave comments.
- Merge. If it looks good, accept it. The changes join
main, and the branch can be deleted.
Click through the steps below to see each one on a branch diagram, next to its Google Docs equivalent.
Let's try it in the browser, based on GitHub's Hello World tutorial:
- In your
marketing-brainrepo, click the dropdown above the file list that says main. - Type a branch name, like
add-voice-rules, and click Create branch: add-voice-rules from main. - On your new branch, open
README.md, click the pencil icon and add a line or two. - Click Commit changes, add a message and click Commit changes again.
- Go to the Pull requests tab and click New pull request.
- Choose
add-voice-rulesto compare withmain. You'll see your changes highlighted. - Click Create pull request, give it a title and a short description, and click Create pull request again.
- Read through the changes. When you're happy, click Merge pull request, then Confirm merge.
- Click Delete branch to tidy up.
The Files changed tab is where the reviewing happens. Here's a small, merged pull request on GitHub's docs repo that fixes a one-word typo. The removed line is in red, the new line is in green, and the changed word is highlighted:
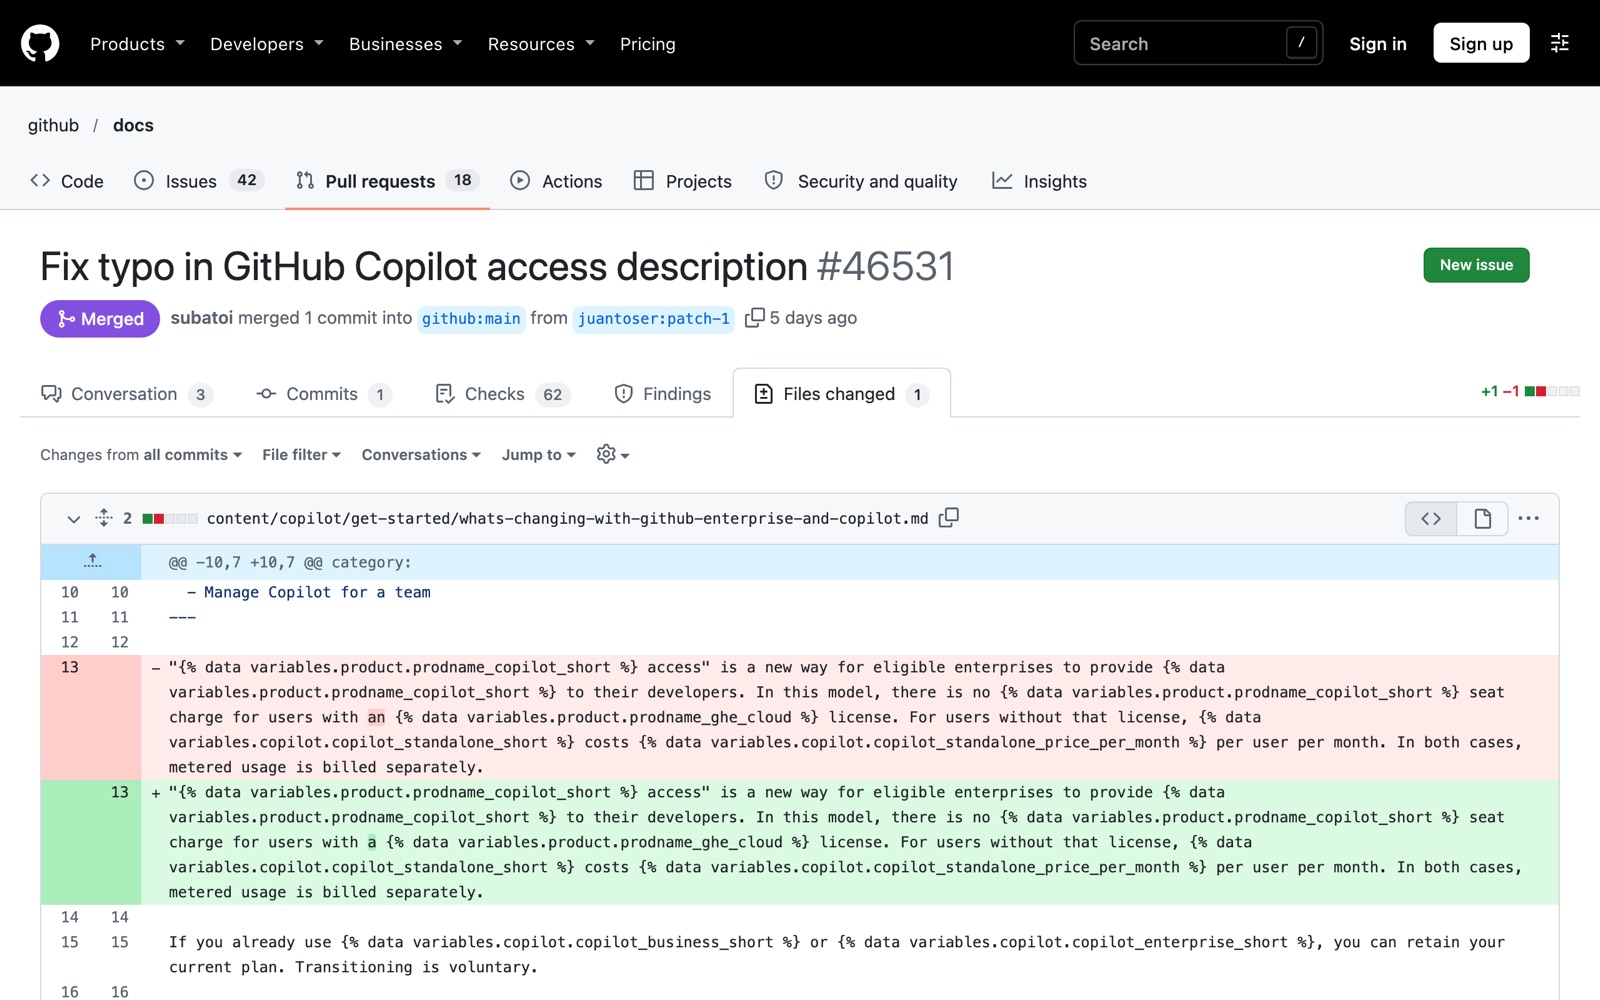
On a repo where you're the only person, this can feel like a lot of ceremony. But it's the habit that matters. When Claude Code makes changes to your digital brain later, it'll open a pull request, and you'll be the reviewer. You'll see every line it wants to add or remove before anything lands in main. That's what makes letting AI edit your brand files feel safe.
What never goes in a repo
Git remembers everything. That's its superpower, and it's also the danger. Once something is committed, it stays in the history even if you delete the file later. So be strict about what goes in.
Keep these out of every repo, private or public:
- Passwords and API keys. API keys are the long secret codes that let tools talk to each other (your AI tool, your email platform, your analytics). Anyone with the key can use your account.
.envfiles. These are small files where developers store secrets like API keys. Add.envto your.gitignorefile so Git skips it.- Client confidential data. Contracts, customer lists, unpublished financials, anything under NDA.
- Personal data. Customer emails, phone numbers, CRM exports.
A .gitignore file helps, but note one catch from GitHub's docs: it only stops new files being tracked. It doesn't remove something you've already committed. So set it up early.
GitHub does have a safety net. Push protection is on by default for your account and stops you pushing many known kinds of secrets to public repositories. Treat it as a backup, never your main plan.
I go deeper into this, including what to keep away from AI agents, in my post on staying safe while building with AI agents.
Coming up in Part 2
You now have an account, a tidy profile, a private repo and your first merged pull request. That's enough Git to get going. The next question is what goes in it. It's tempting to throw every doc you've ever written into one folder and point AI at it. That tends to make results worse, not better.
In Part 2, your AI brain is not a dumping ground, I'll walk through how to structure a repo so AI gets the right context at the right time: what to put in your CLAUDE.md, how to split brand rules from examples, and how to keep it all tidy as it grows.
Photos on Unsplash: cover by Andrew Neel. Screenshots are my own, taken from github.com and desktop.github.com in November 2026.